The Media Room
A few years back my friend Justin bought a front-projection TV. While I was quite impressed by the picture size (!) and quality, I scoffed at the price. $5000 to watch TV and movies? You’ve got to be kidding.
Soon after I bought my house, Justin came to stay for awhile. Awhile turned into semi- permanently, so we set up his projector in the larger of the two basement bedrooms. It wasn’t long before I began plotting to transform that bedroom into a full-on media room. And, within two years I’d have shelled out nearly $5000 for my own projector.
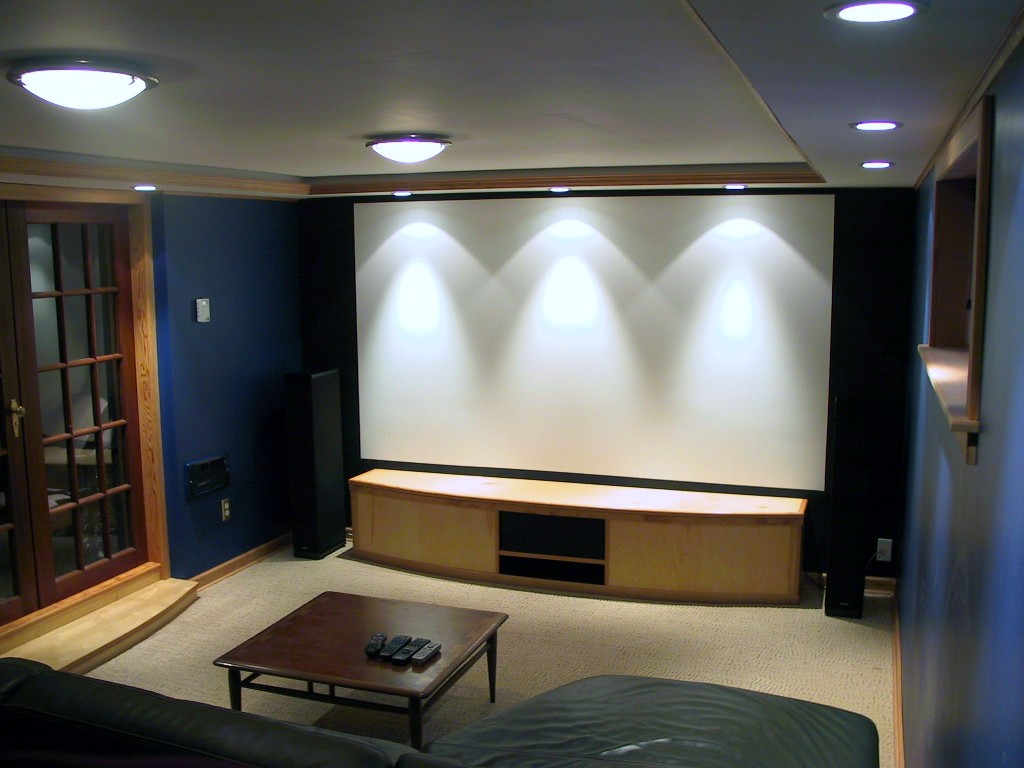
To whet your appetite, here’s what the end result looks like:
The Plan
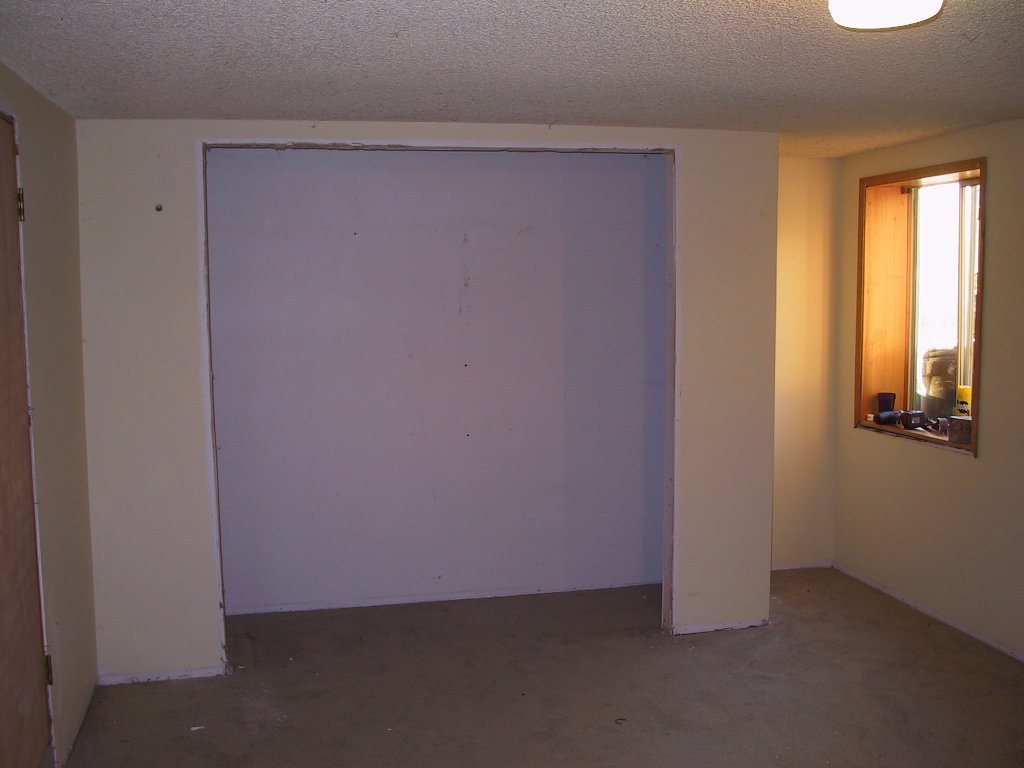
The room I had available was a basement bedroom, 11’ by 18’, with a 7’ ceiling. Not huge, but large enough I hoped, for seating 8 people in two rows. I had visions of large media-style recliners, but these visions would evaporate a few months into the project.
The projector I had my eye on would cast a hi-definition image from 16’ to a size of 120” (diagonal). This was about perfect for the room, so I planned my design around this specific model. Knowing in advance where the projector would be mounted was a distinct advantage, and it allowed me to fine tune some of the other aspects of the room.
When you’re considering a projector there are a lot of factors to understand. Brightness is one of them that the salespeople will push, but just as important are contrast, fan-noise, and the technology used to generate the picture. Mine is a high-end LCD model, which is great for brightness and middle of the road for contrast. Fan noise is pretty good, but if I were to buy another I’d look for a quieter one.
I already owned a sizeable collection of A/V equipment, including the requisite DVD player, receiver, cd changer, etc. And, of course, a TIVO. Knowing the projector I would be buying also enabled me to plan in advance the types of cable I would need to run from the equipment to the ceiling where the projector would be mounted.
Demolition
I began demolition in the early summer of 2003. The room needed to be gutted, I decided. For one, it had a large closet at one end of the room that needed to go. And it had a popcorn ceiling. And it had windows where I didn’t want them. And the list went on and on.
Demolition took a couple of weekends, and revealed several surprises. Actually, I wasn’t that surprised – our house has so many interesting defects that I’m not usually surprised anymore when I uncover them. The first thing of note was the framing of the exterior wall. Or rather, the lack of framing. The drywall had been affixed to non-structural 2x2 studs, firred out from a largly crumbling foundation. My house is half set into a hill, and this room is half below ground, with the foundation varying in height from 2 feet in the front of the room to roughly 3 feet in the rear. That is, the sill height wasn’t level – it had several small steps and slopes. There was no sill plate. At roughly 6 foot intervals there were 6x6 posts supporting a beam which supported the floor joists of the first floor. Spanning the posts was the original fir clapboard siding (covered over on the exterior with the current siding). No sheathing in the basement, apparently.
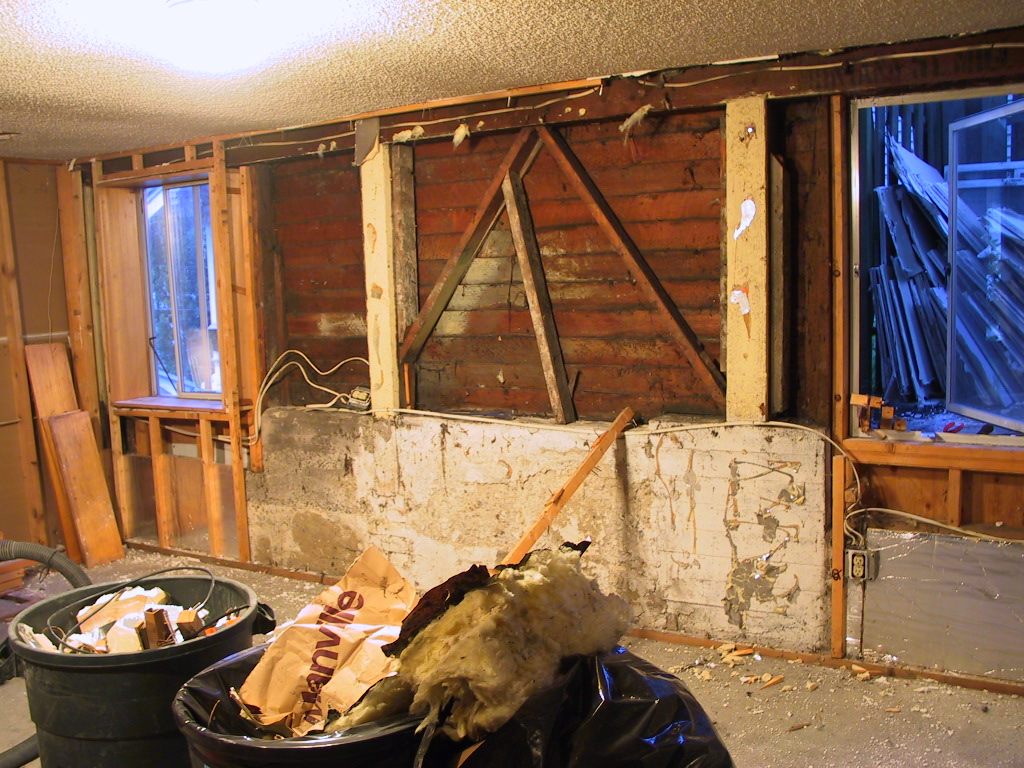
The most alarming thing of all this was that two of the 6x6 posts were completely rotted out at the bottom where they were sunk into the concrete foundation. My house was apparently levitating in yet another place (I’d fixed two other posts in the year prior). I quickly realized that the required solution would be to repair and augment the foundation, then frame in a new structural wall the entire length of the room, atop of this freshly level foundation.
Even though it was apparent that these two posts weren’t doing much of anything, my mental faculties wouldn’t allow me to sledge hammer them out until I’d built a temporary wall inside the room to take the weight of the house. Once this was built, I augmented it with two 20-ton jacks and a temporary beam. Then I removed the posts: it was kind of sickening how easily they came out and how disintegrated their ends were.
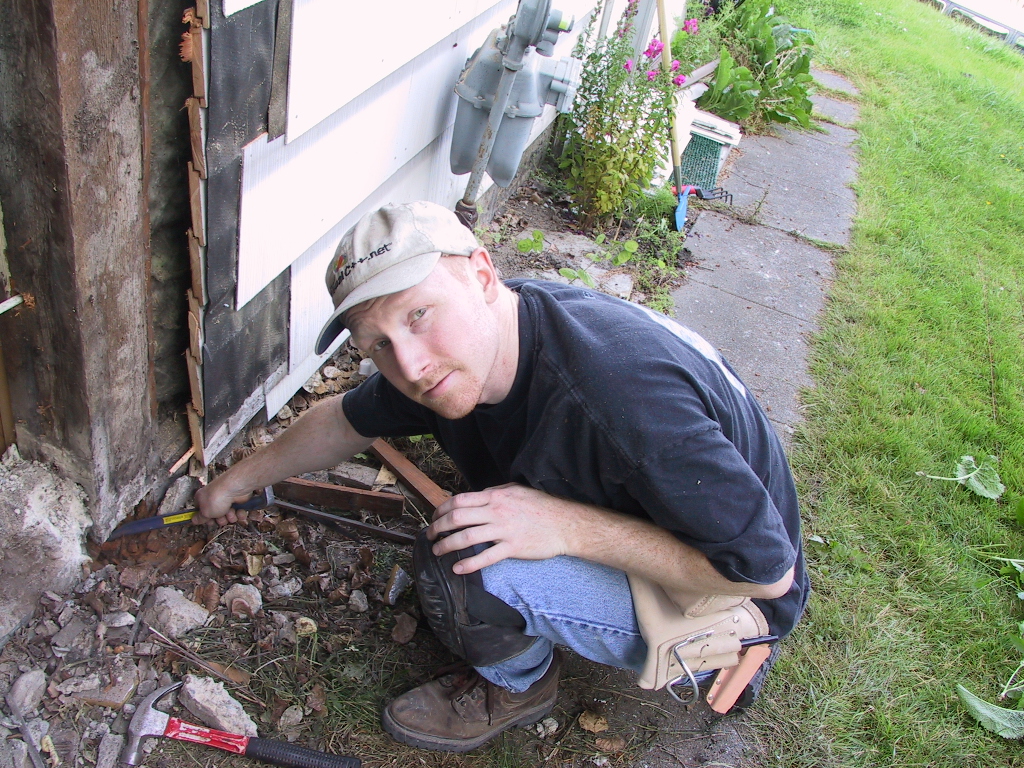
The foundation was crumbling quite a bit in one ten-foot span. I decided to remove all of the defective concrete as far as I could and replace it with new concrete. With the concrete removed I used a hammer drill to boar holes into the footing and the good foundation, into which I epoxied 5/8” rebar. The old foundation wasn’t steel reinforced, so this new section would be considerably stronger. Around the rebar I built plywood forms for to hold the concrete. And these forms went nearly the length of the entire wall such that the foundation would end up with a level sill.
I hate pouring concrete. We live on a hill, and the only option for having concrete delivered would be to get a pumper truck. For the yard or so of concrete that I needed, I decided to mix it with a portable mixer. That’s not so bad, but carrying the 80lb bags up two flights of stairs from the street isn’t fun.
I sprayed a latex bonder (it has the look and consistency of milk) onto the existing foundation where it would contact the new concrete. And I mixed the bonder with the concrete, which according to the instructions will increase the overall strength of the mix. One funny thing happened though – I’d mixed a bunch of bonder with water in a 5 gallon pail, and of course it accidentally got tipped over on the vegetable garden. That night Trissa called the 800 number for the bonder to ask if we could eat the broccoli. “Sure, it’s just latex” was the response. That summer we had the largest broccoli heads we’d grown to date, and they were tasty.
After the pour I got a little nervous. One of my forms was bulging way more than it should have, so I had to scurry and brace it. Fortunately there’s a concrete wall about 10 feet away that I could lever against, and I was able to use a 2x4 to push the bulge back into place. Don’t tell anyone.
Framing
With the popcorn ceiling, old drywall, and the old nasty carpet safely at the dump, and the new foundation freshly out of its forms, it was nearly time to begin new construction. Fortunately for me, my dad was due to arrive for his annual week-long visit.
I should mention that not everything made it to the dump. I love to salvage old materials, and the old bedroom was a small trove. I managed to salvage a pile of 2x4s (from the closet), 2x2’s from the firred out walls, and the fir clapboard siding. As I write this all of these materials have been completely repurposed and used.
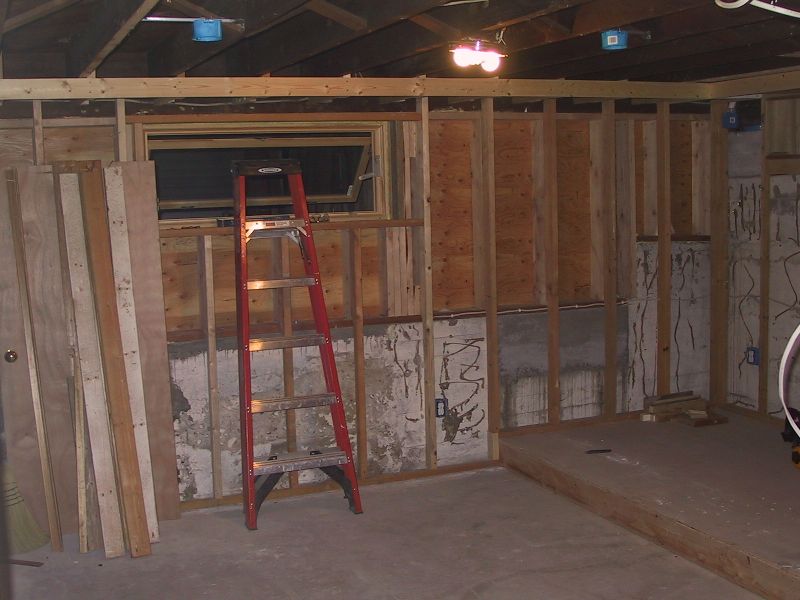
Dad and I made quick work of the main framing task – the exterior wall. With a new treated sill bolted to the foundation, we dutifully installed new posts where the old ones had been. Then, we installed a 2x6-framed wall along the entire span and sheathed the exterior with plywood. Oh, and we found an unused awning window at the salvage yard which is simply perfect for the space.
We found one more piece of structural work in yet another rotted out post on the opposite wall. The house is post-and-beam construction, and there’s a beam that runs down the center of the house, held up every 8 feet with posts. I really don’t understand why my house hadn’t collapsed and rolled down the hill by the time I bought it, since now this was the fifth or sixth post that had rotted out at the bottom. Using the 20 ton jacks again, we jacked up the beam (to level…) and removed the old post. We dug down through the cement floor and uncovered the brick footing the old post had sat on, and replaced that with a new concrete footing. This time I replaced the 6x6 post with two 4x6 treated posts that I bolted together. Will there be any more rotted posts? There’s only a couple left in the house that I haven’t uncovered…
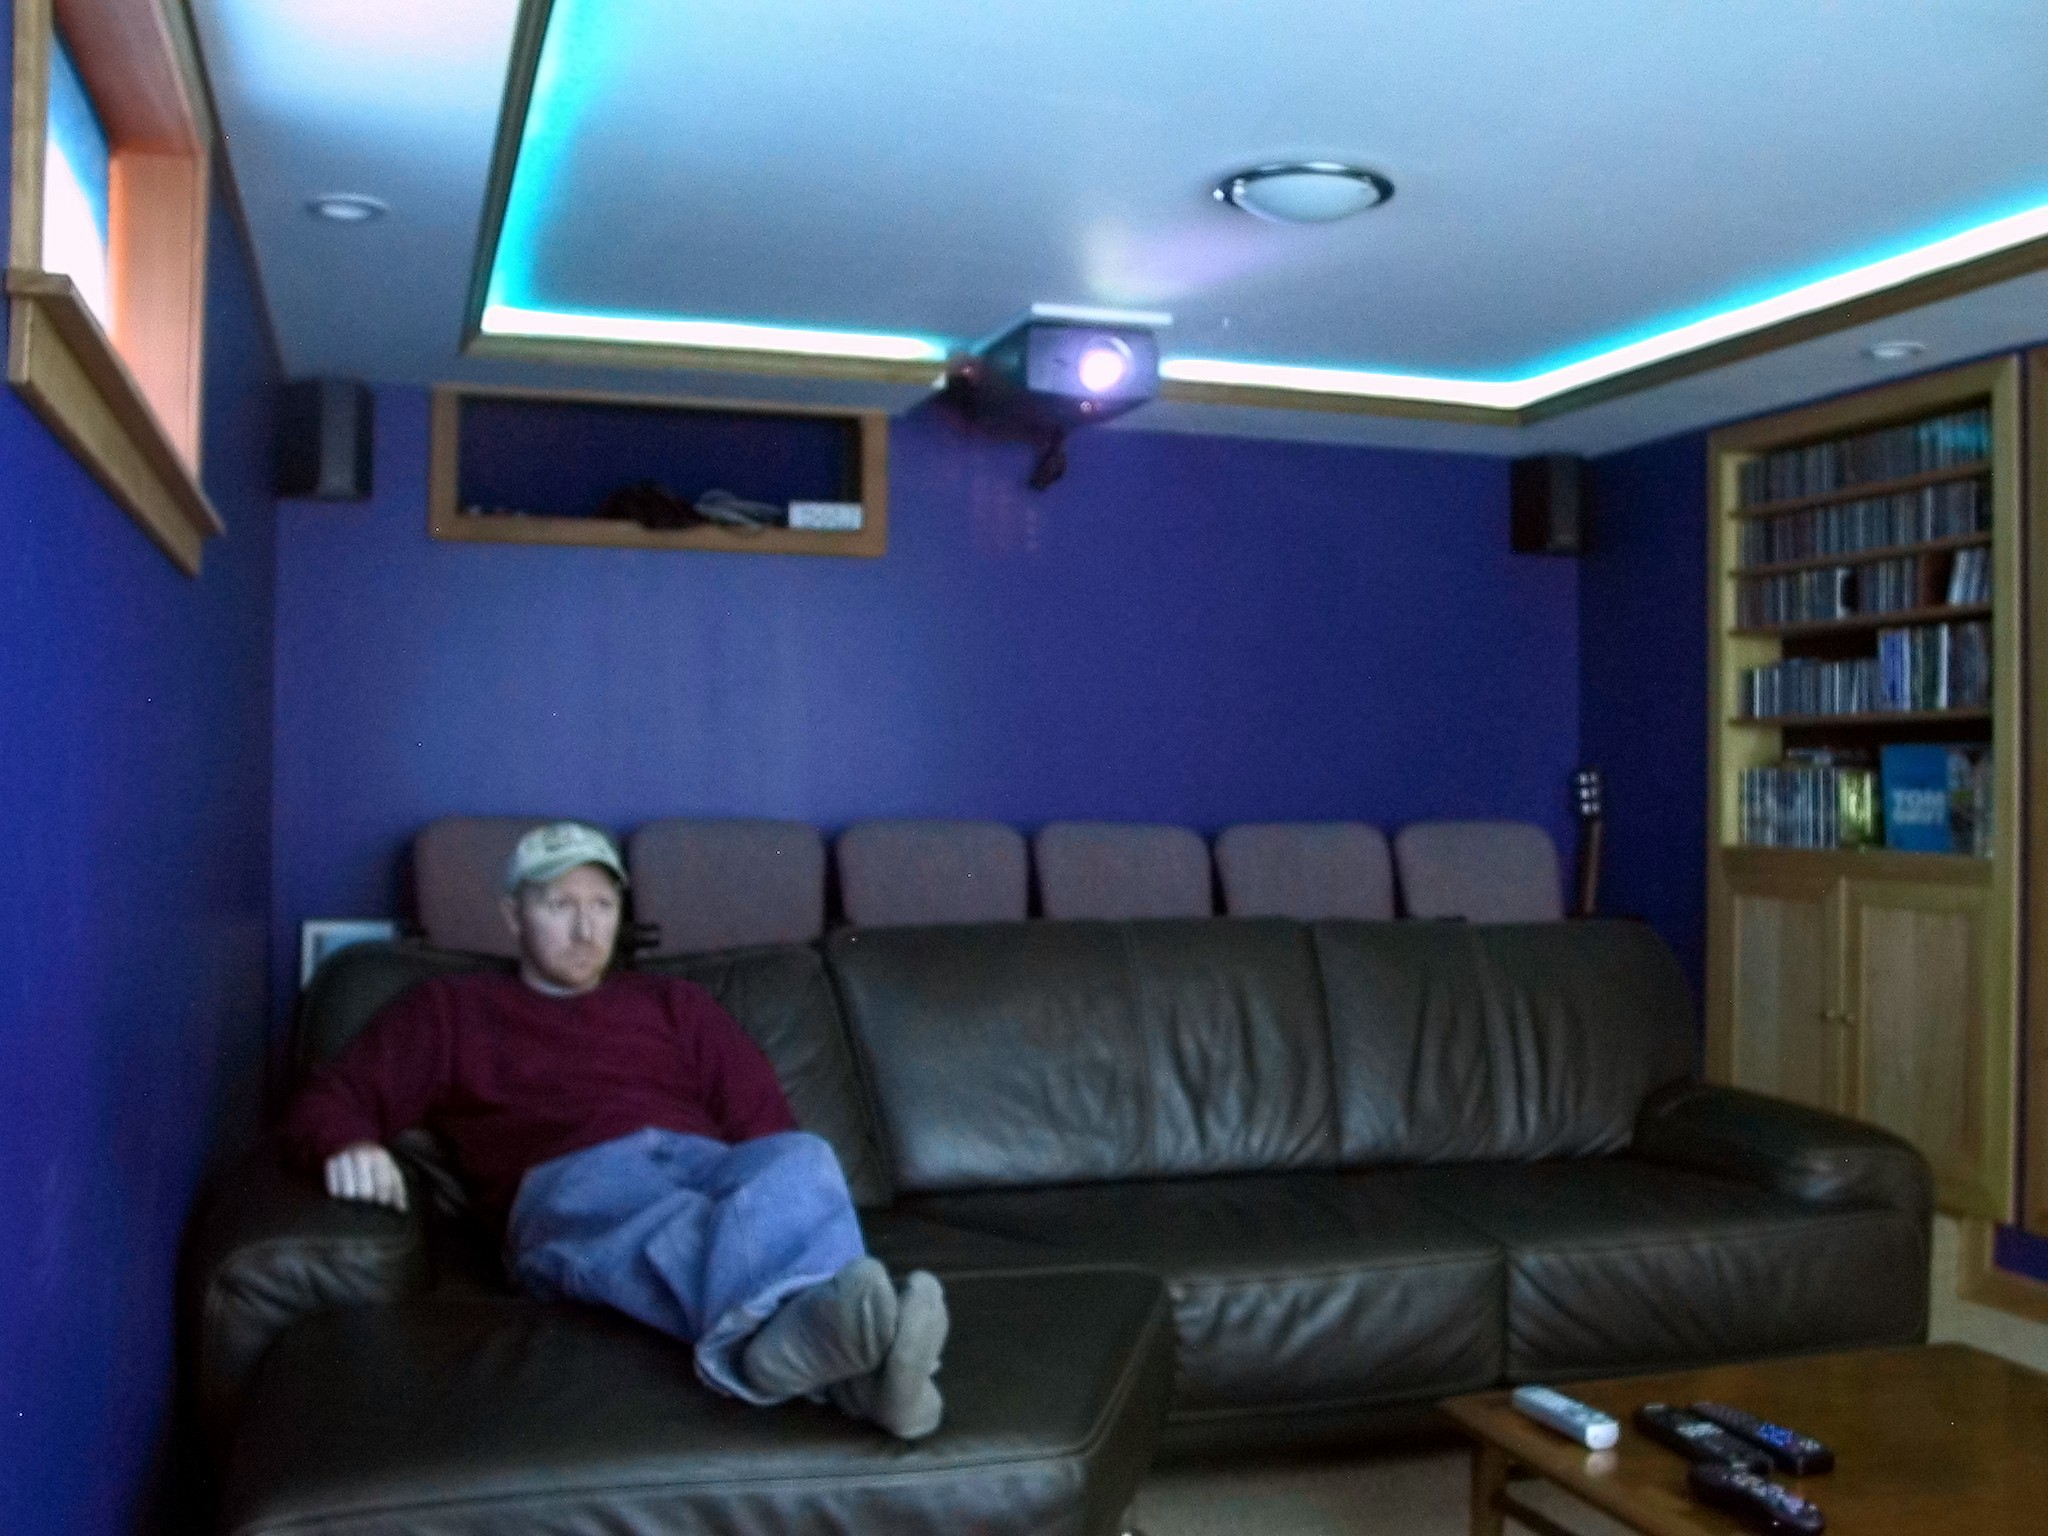
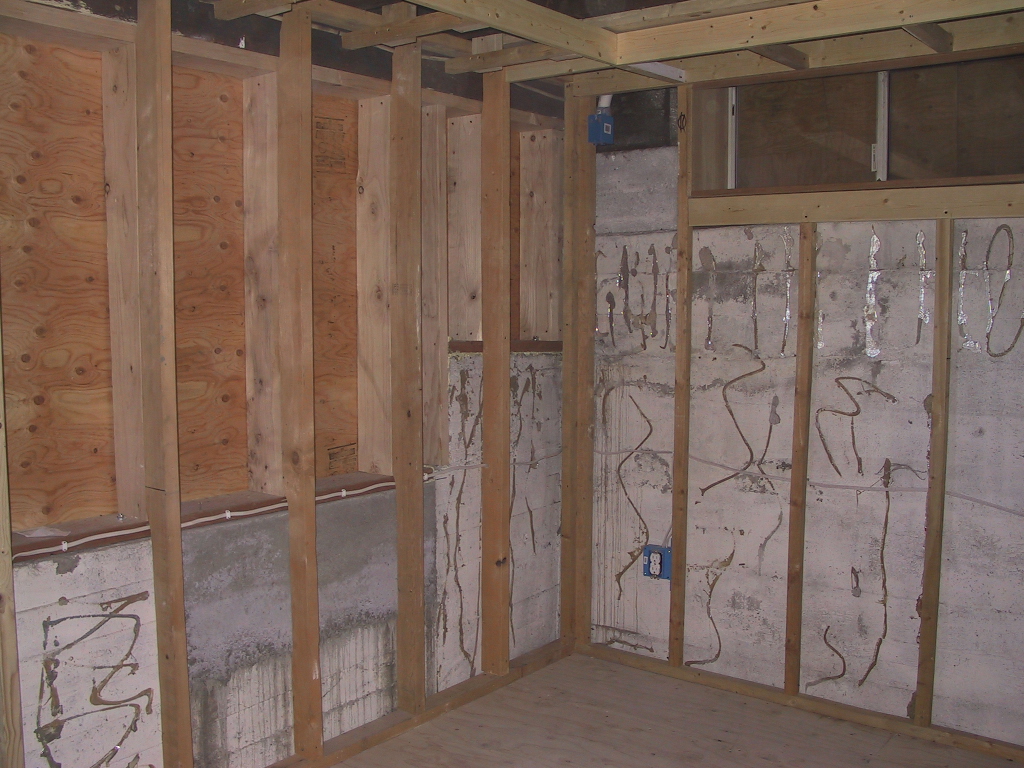
My plan called for two interesting and fun characteristics, which needed to be framed. The first is a raised platform in the rear of the room. I wanted a raised platform so that I could have two rows of seating, with the folks in the back able to see over the folks in the front. We built the platform out of 2x6’s (anchored to the walls and floating on the floor) and sheathed it with ¾” plywood.
The other characteristic of the room that required framing is a perimeter valance. The valence is a lowered section of the ceiling (about 4 inches) that runs the perimeter of the room, about 18” deep from the wall. The plan was to have recessed lighting in the valance, and also to use it as a raceway to run cabling for the speakers and projector.
Dad is always thinking, and before we got down to repurposing those 2x2’s (from the old wall!) for the valence, he set up a series of pulled taught strings that would enable us to frame the valence in both plumb and level. It took a while to get the valence all framed in, but once it was done it looked great. Even though ceiling height is a low 7’, the valence makes the room look and feel more comfortable.
One other framing task is worth noting: The projector is ceiling mounted. To make it easier to hang the projector later, we installed some ¾” plywood between and flush with the ceiling joists where the projector would be hung. This gave me something to screw the projector mount to later.
Wiring
I’d researched a number of media rooms online and one of the things I saw a lot of people doing was running conduit for the media cables. This seemed like a good idea at the time, but in retrospect I probably wouldn’t do it again. For one, running the conduit was harder than I expected. I wasn’t using a conduit “system”, and instead rolled my own out of standard electrical conduit from the home center. I had to come up with some custom solutions for terminating the conduit in electrical boxes, which would be the terminal points for my speaker wire. Then, I found it pretty insanely difficult to pull the expensive cable I’d bought through the conduit. The fact is, I very much doubt I’ll ever replace that wire with anything better, so the point of pulling it through the conduit is pretty much moot. The other thing is that even though I used 2” conduit, a couple of the projector cables I’d bought had ends that were too big to fit through the conduit – so they ran in the valence raceway. The coolest thing about the conduit is that the speaker wires all enter my wiring closet from a single point – and it looks very tidy and neat.

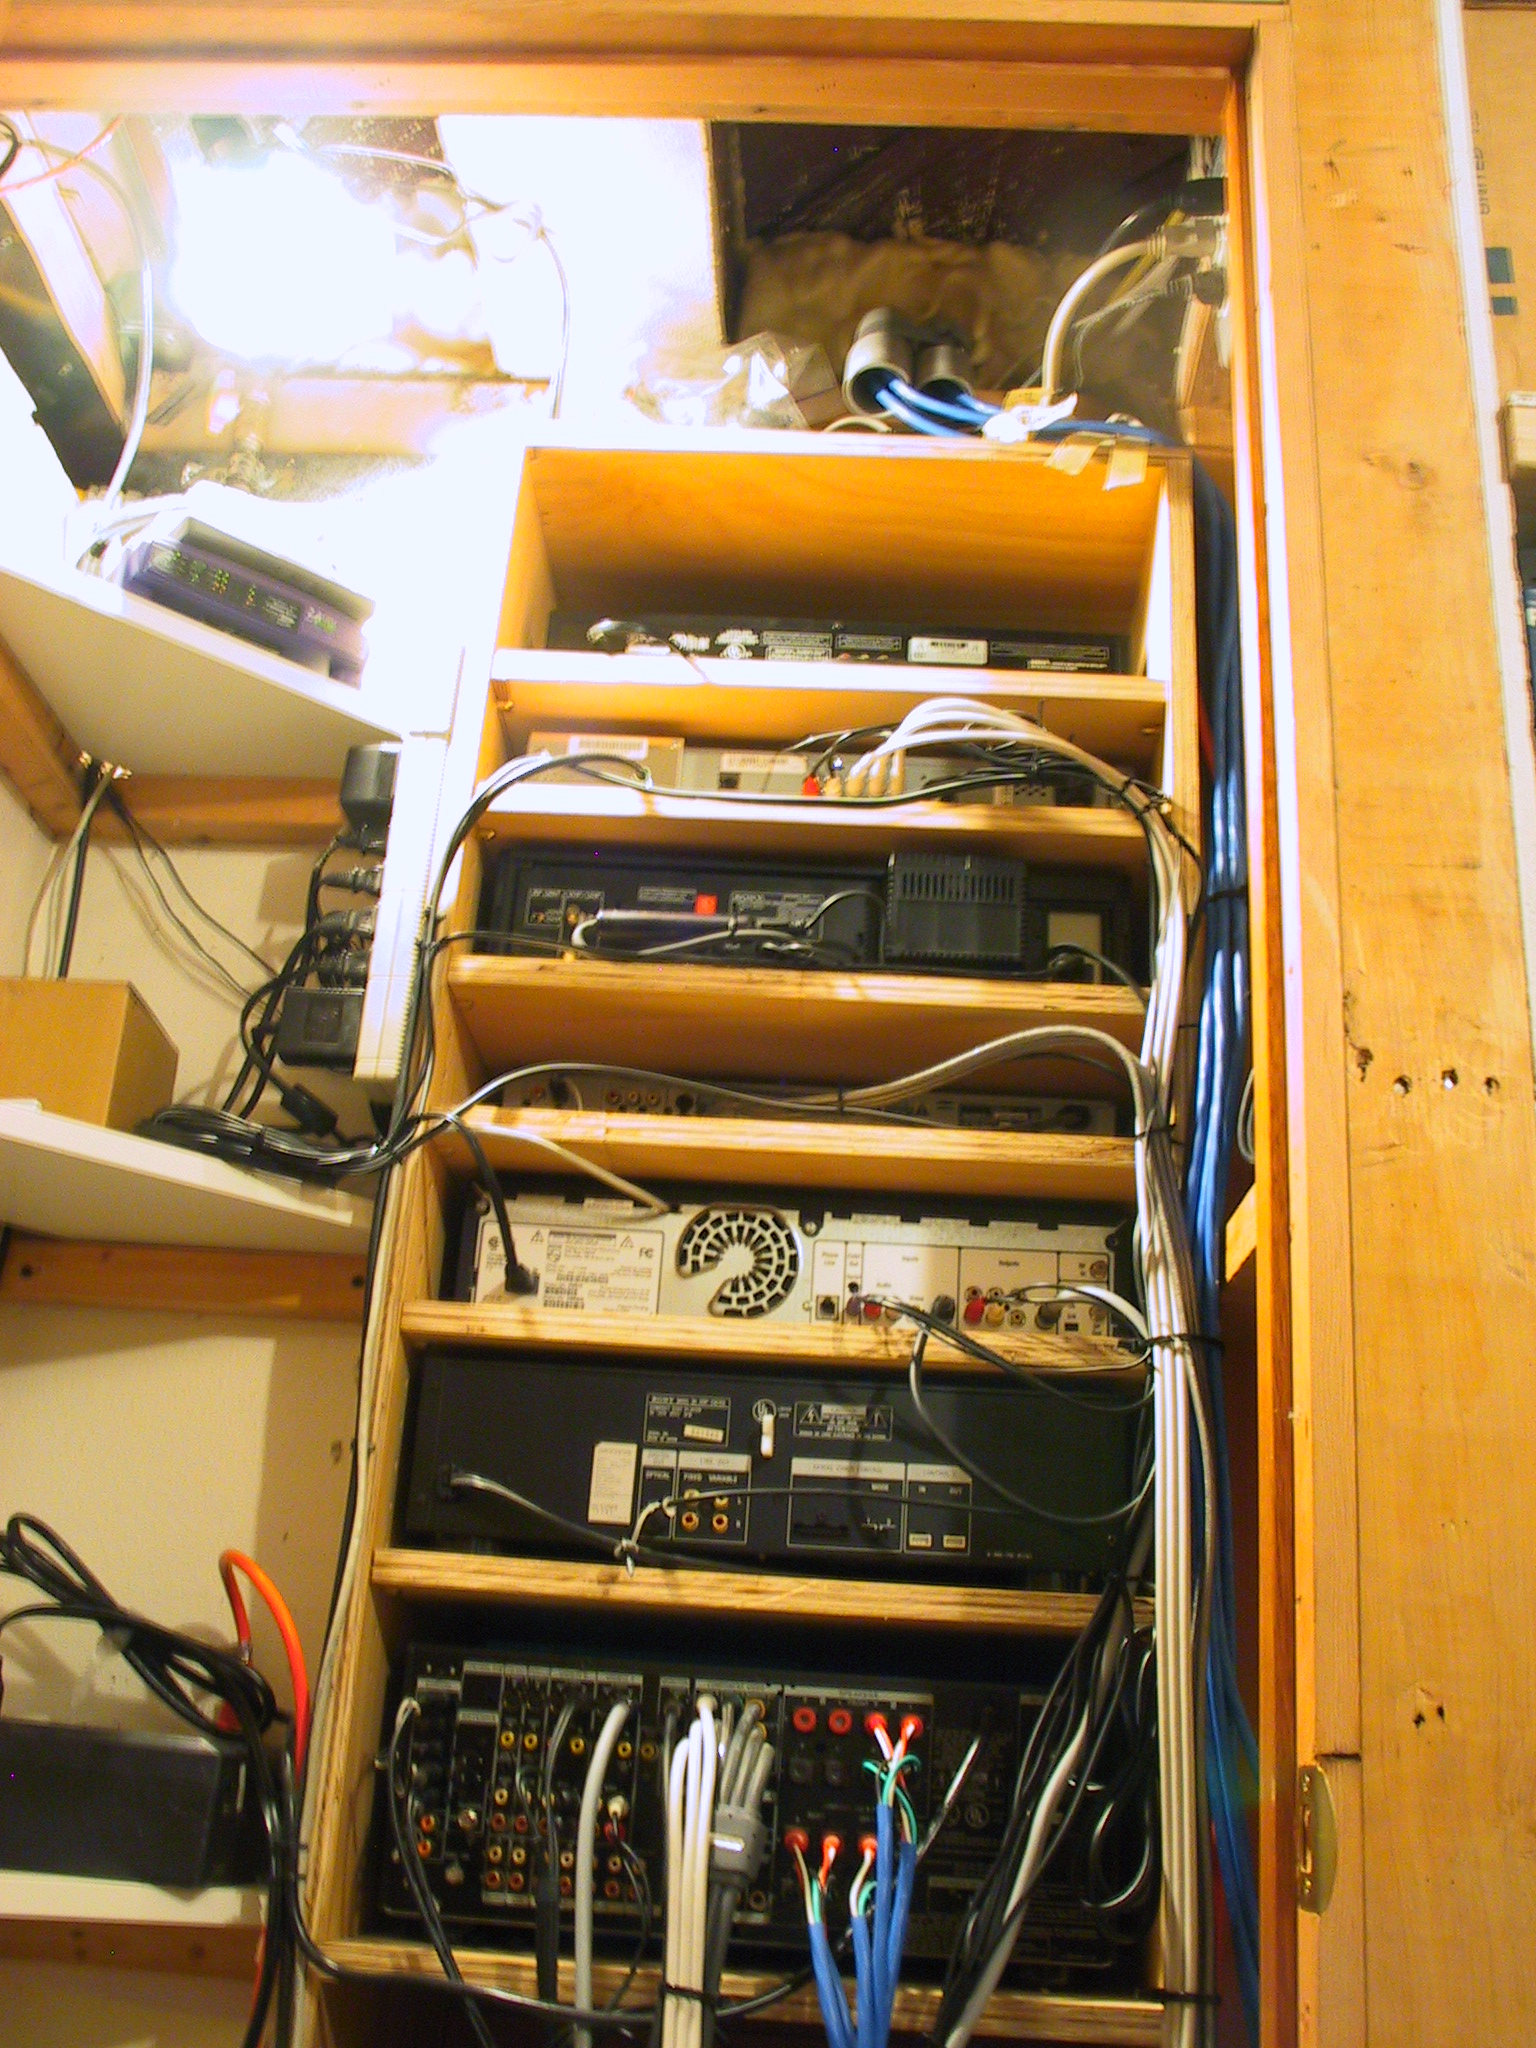
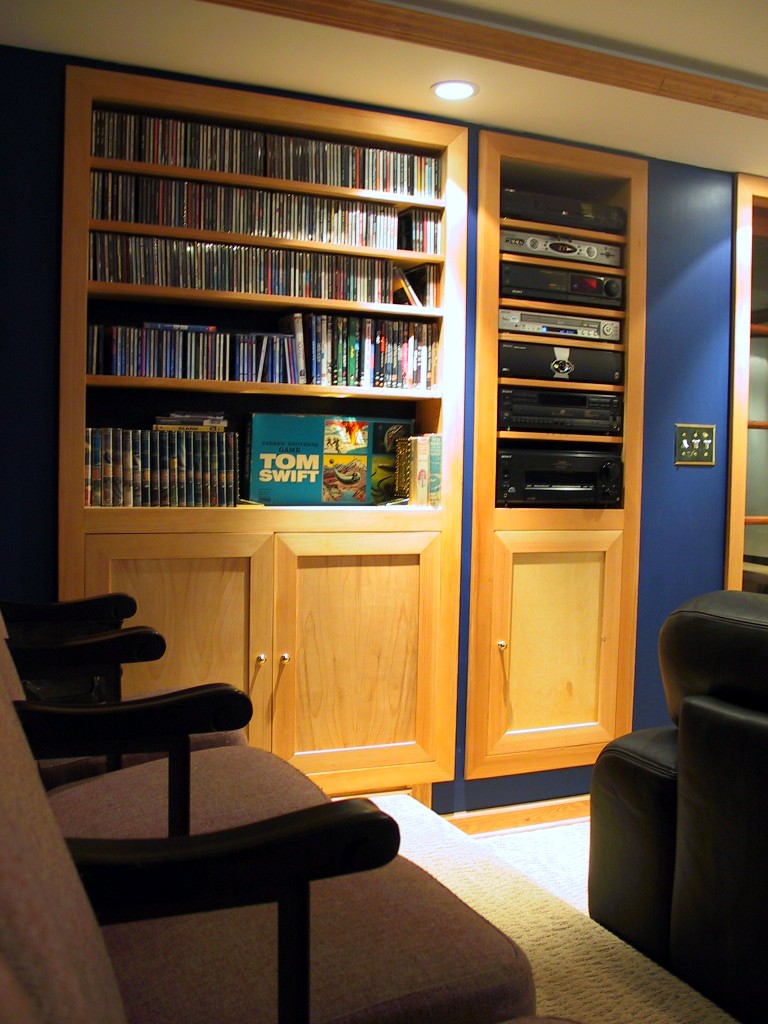
I should mention a couple of things about the wiring closet, which I think is a very cool feature. I’ve always hated having to deal with cables and such behind the A/V equipment, which is invariable in some cabinet against a wall. For the media room I decided to have the A/V equipment sit in a “rack”, which is really a nice furniture-grade shelf that is recessed into a wall. On the opposite side of that wall is my laundry room, and on this side I built a closet to enclose the backside of the equipment. The beauty of this is that I can access all of the equipment from behind and keep all the cables nice and neat.
For room lighting I chose three distinct systems. I purchased two “theaterish” low-profile room lights from Ikea. The quality is a bit lower than what the lighting store had, but I was okay with this since the price was a bit lower too (about 1/10th the price). And really, the quality is just fine. I installed 9 low-voltage halogen cans in the valence (three on each side and three in the front), and these provide the real lighting for the room before and after a movie. Lastly I installed a blue rope light hidden behind a cove I built out of crown molding, installed on the inside perimeter of the valence. This is the “mood” light for during a movie, and it has a dimmer control.
The last thing I’ll mention about wiring is power for the projector. Projectors run hot, and even after you turn them off they keep their fans running. This is primarily to protect the lamp, which if it cools too fast, will reduce the bulb lifespan (or potentially explode!). Since bulbs are expensive (several hundred dollars) it pays to ensure that fan runs properly – even if there’s a power outage during your movie. To handle this, I ran an extension cord through the raceway from the wiring closet to the projector. In the wiring closet, the extension cord is plugged into an uninterruptible power supply (UPS). This way, if the power goes out, we can safely shut down the projector.
Insulation and Drywall
Some movies are just meant to be watched with the volume turned up. I wanted to be able to do this without disturbing the rest of the house, and so I spent a lot of time researching solutions.
Had I the headroom, I would have used special metal brackets to hang the ceiling drywall. These brackets effectively separate the drywall from the framing, which dramatically reduces the ability for sound vibration to make its way outside the room. But, brackets like this would have reduced the headroom another inch or so, and I wasn’t prepared to give that up.
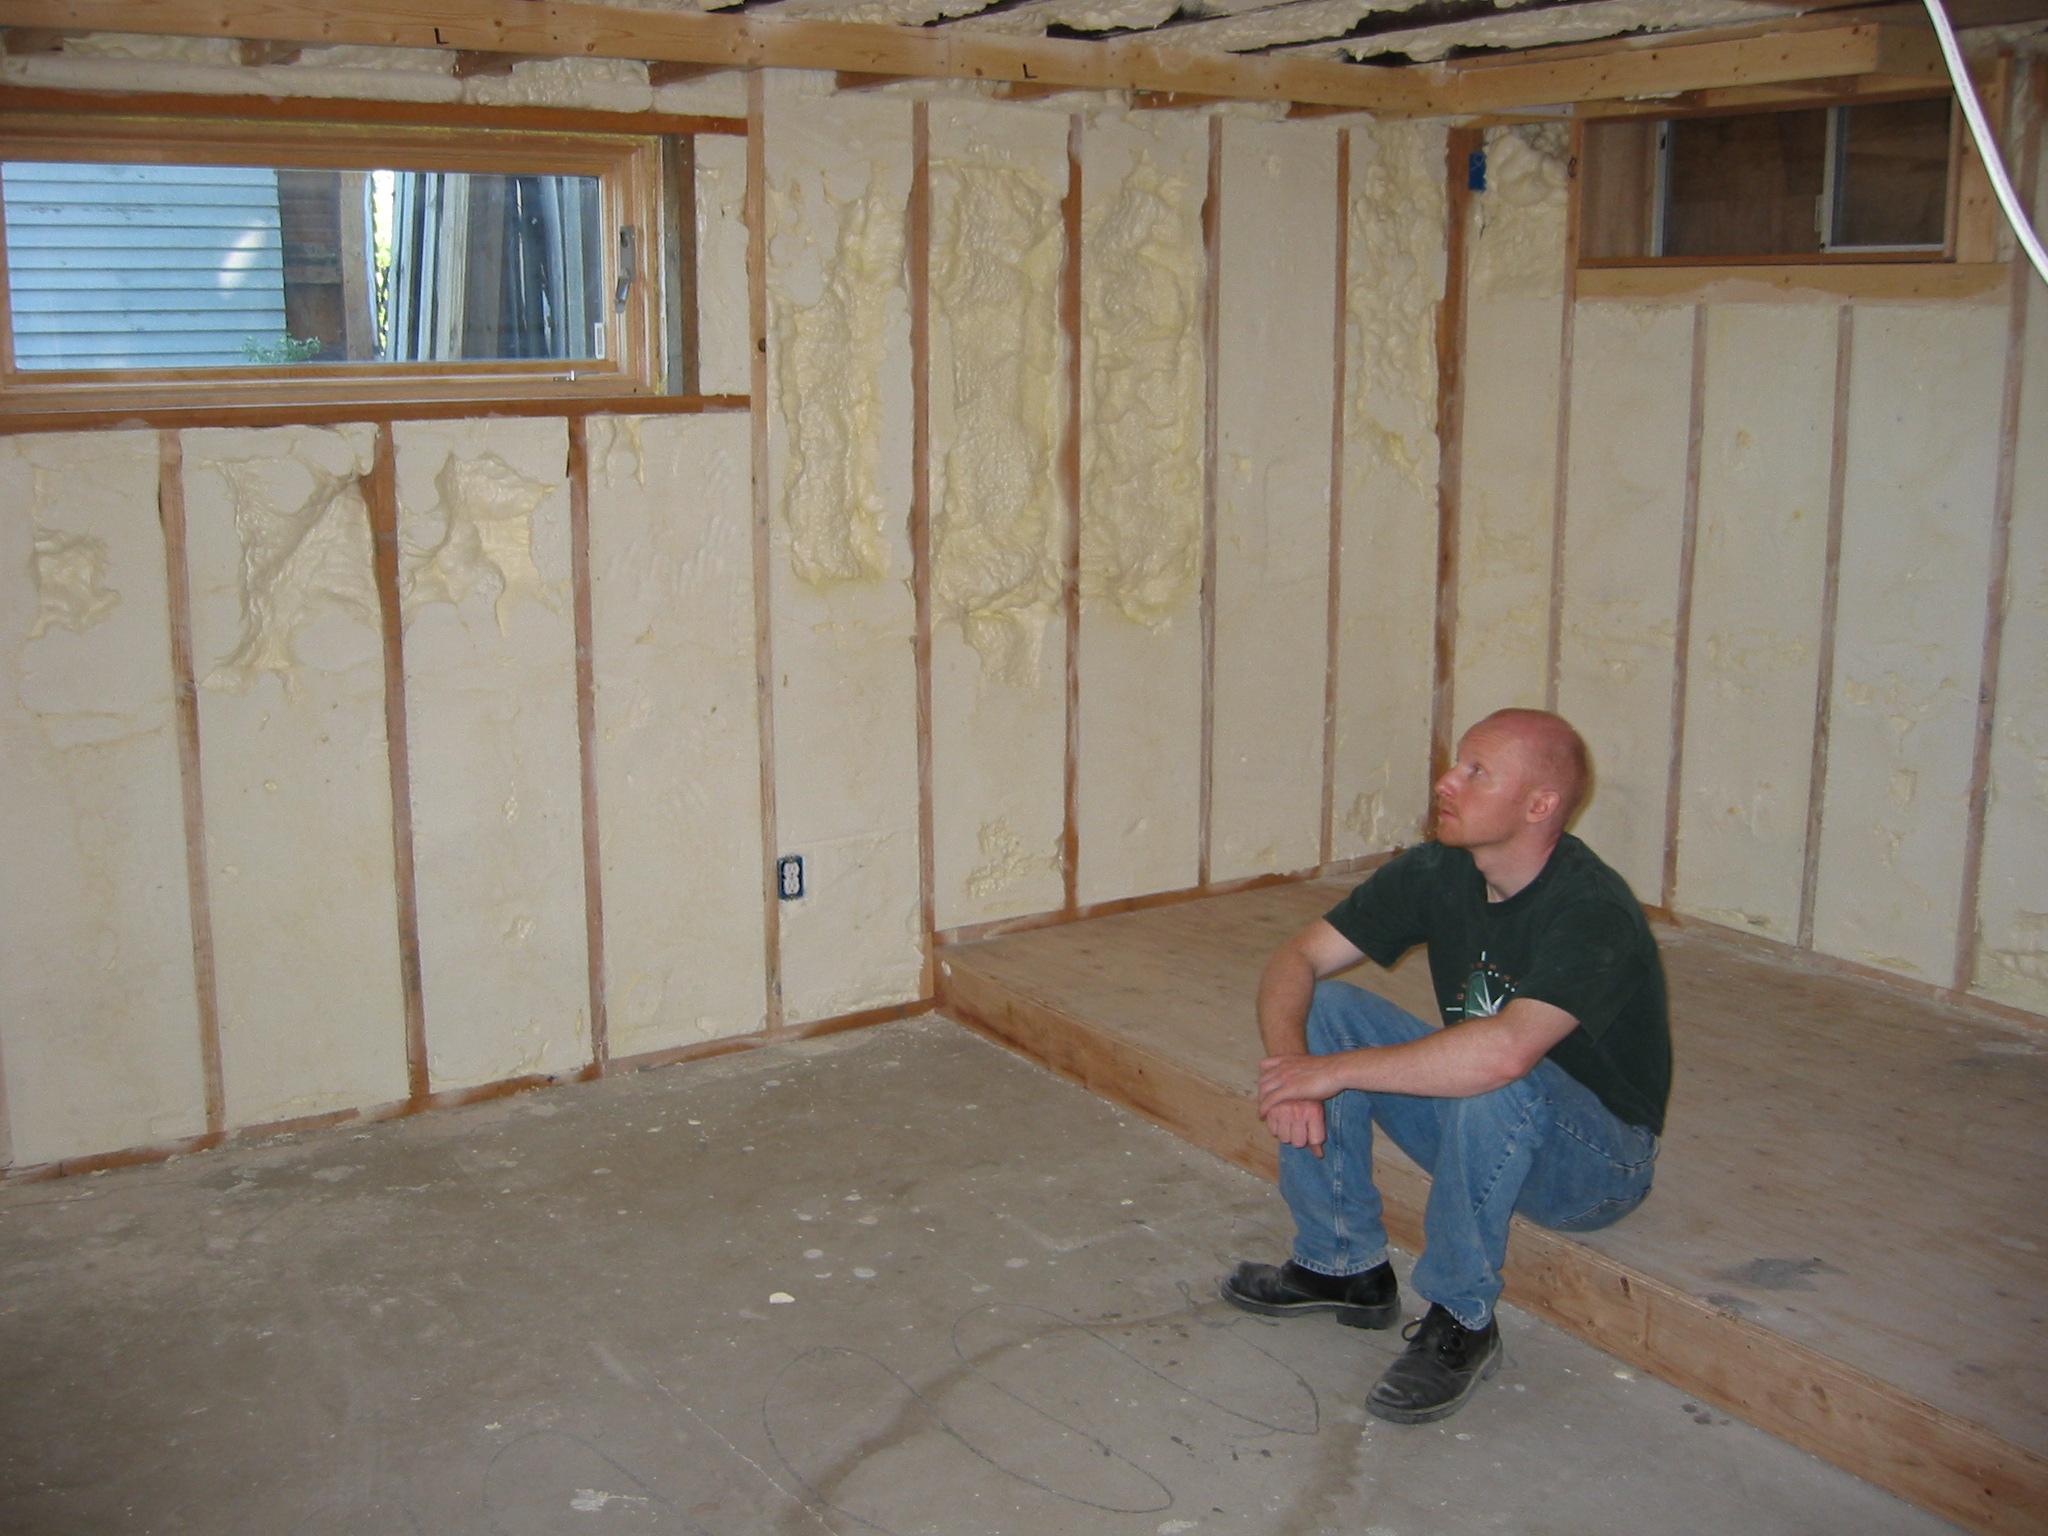
I ended up having Icynene insulation sprayed into the ceiling and wall cavities. I first saw Icynene in use on This Old House, and in addition to having a high r-value, it is pretty good at sound deafening. It cost me several hundred dollars to have a crew come and spray the stuff on, but I was impressed with how quickly it went in, and how well it insulates. Icynene sprays onto a surface, then immediately balloons to something like a hundred times its volume. As it expands, it fills all cracks and voids.
After the insulation was in we brought in the drywall. I hate drywall. Mostly I just hate finishing it – it’s hard to get a professional looking job. To make matters worse, the valence introduced several more inside and outside corners than if the room were just a box.
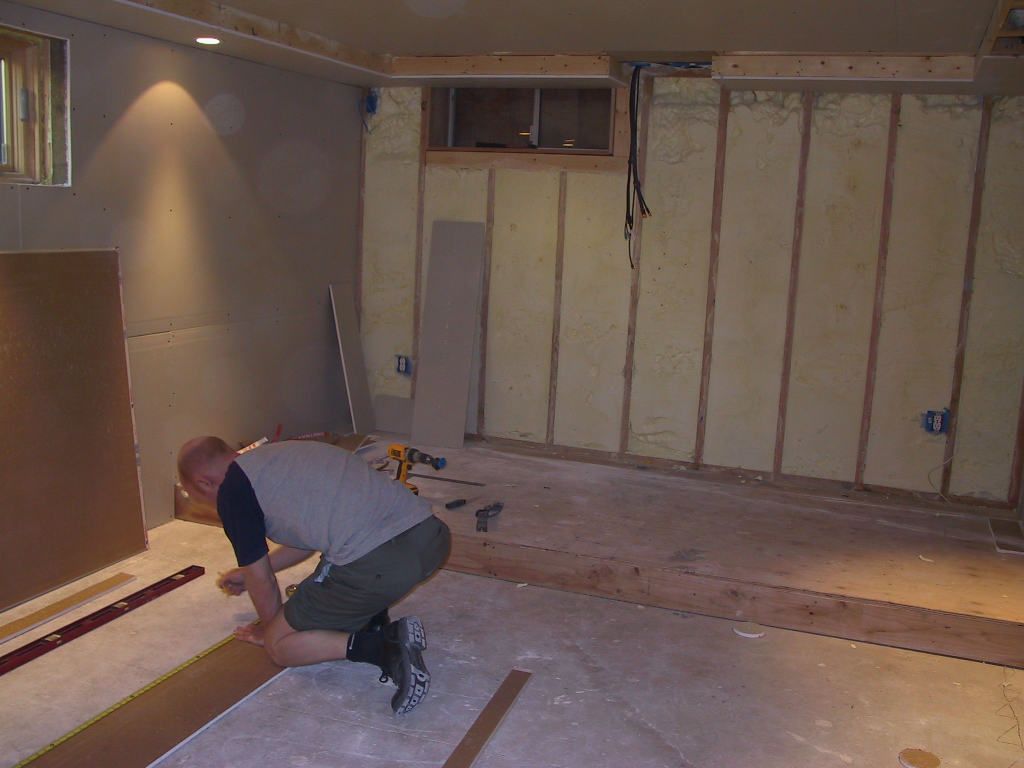
It took a couple of weekends to get the drywall hung and taped. Then spent a few more weekends sanding and finishing.
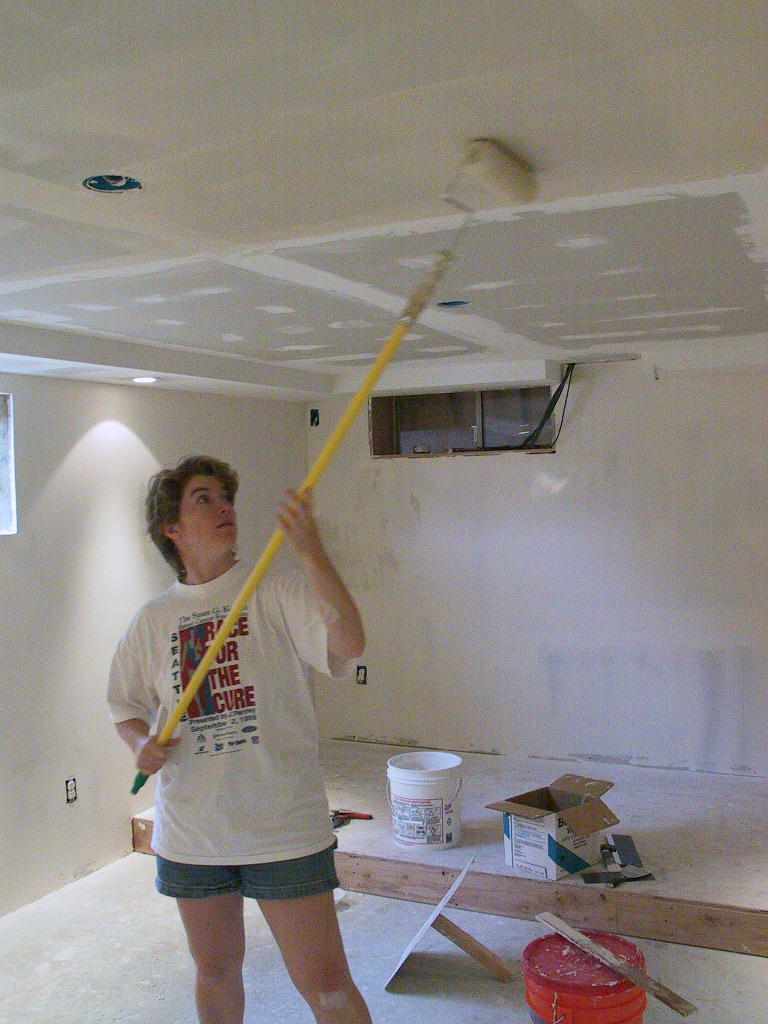
My plan was to project the picture directly onto the front wall – sans screen. Projector screens are expensive, and I only wanted a screen if the picture was going to be terrible. So the first plan was to ensure the front wall was completely smooth. To achieve this we applied a skim coat of topping compound to the entire wall, and sanded it smooth. This turned out really nice, and I recommend it to anyone not needing the light-enhancing qualities of some screens.
With the drywall in place I started getting excited! The end of the project was in sight, and we’d be watching movies in no time!
Finishing Work
Not so fast. My plan called for nice built in cabinets and trim, and these had to be built and installed. The room needed a step built at the entry (the other half of the basement is 8” higher than this room). And the French doors I’d bought at the salvage yard needed to be refinished.
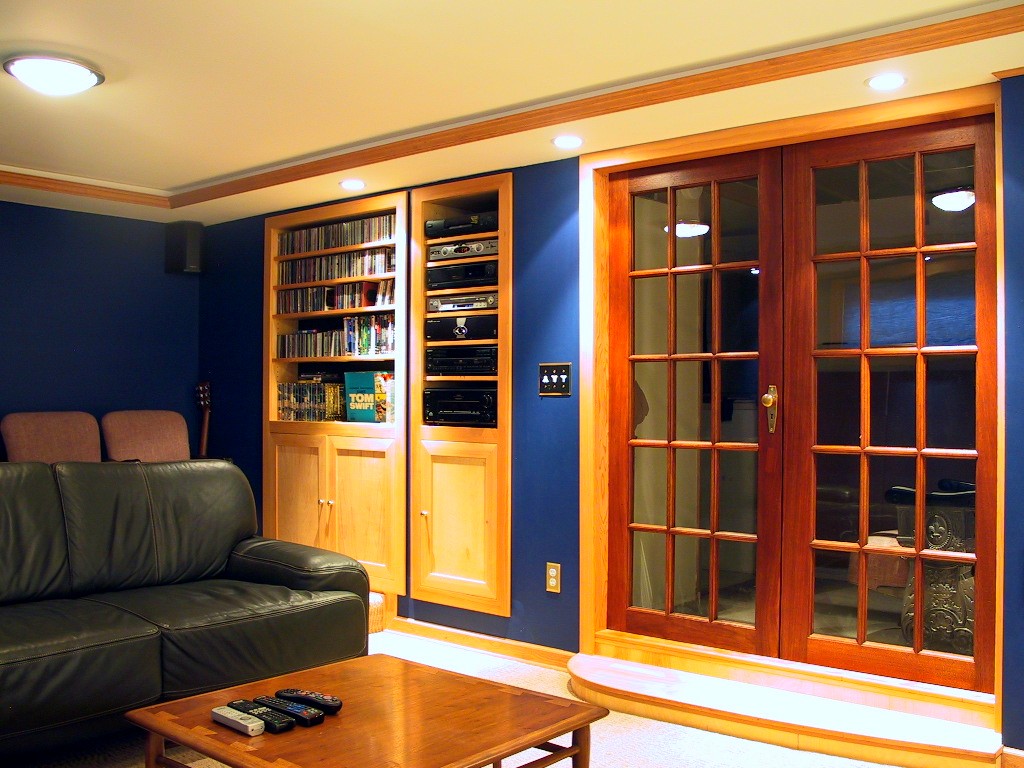
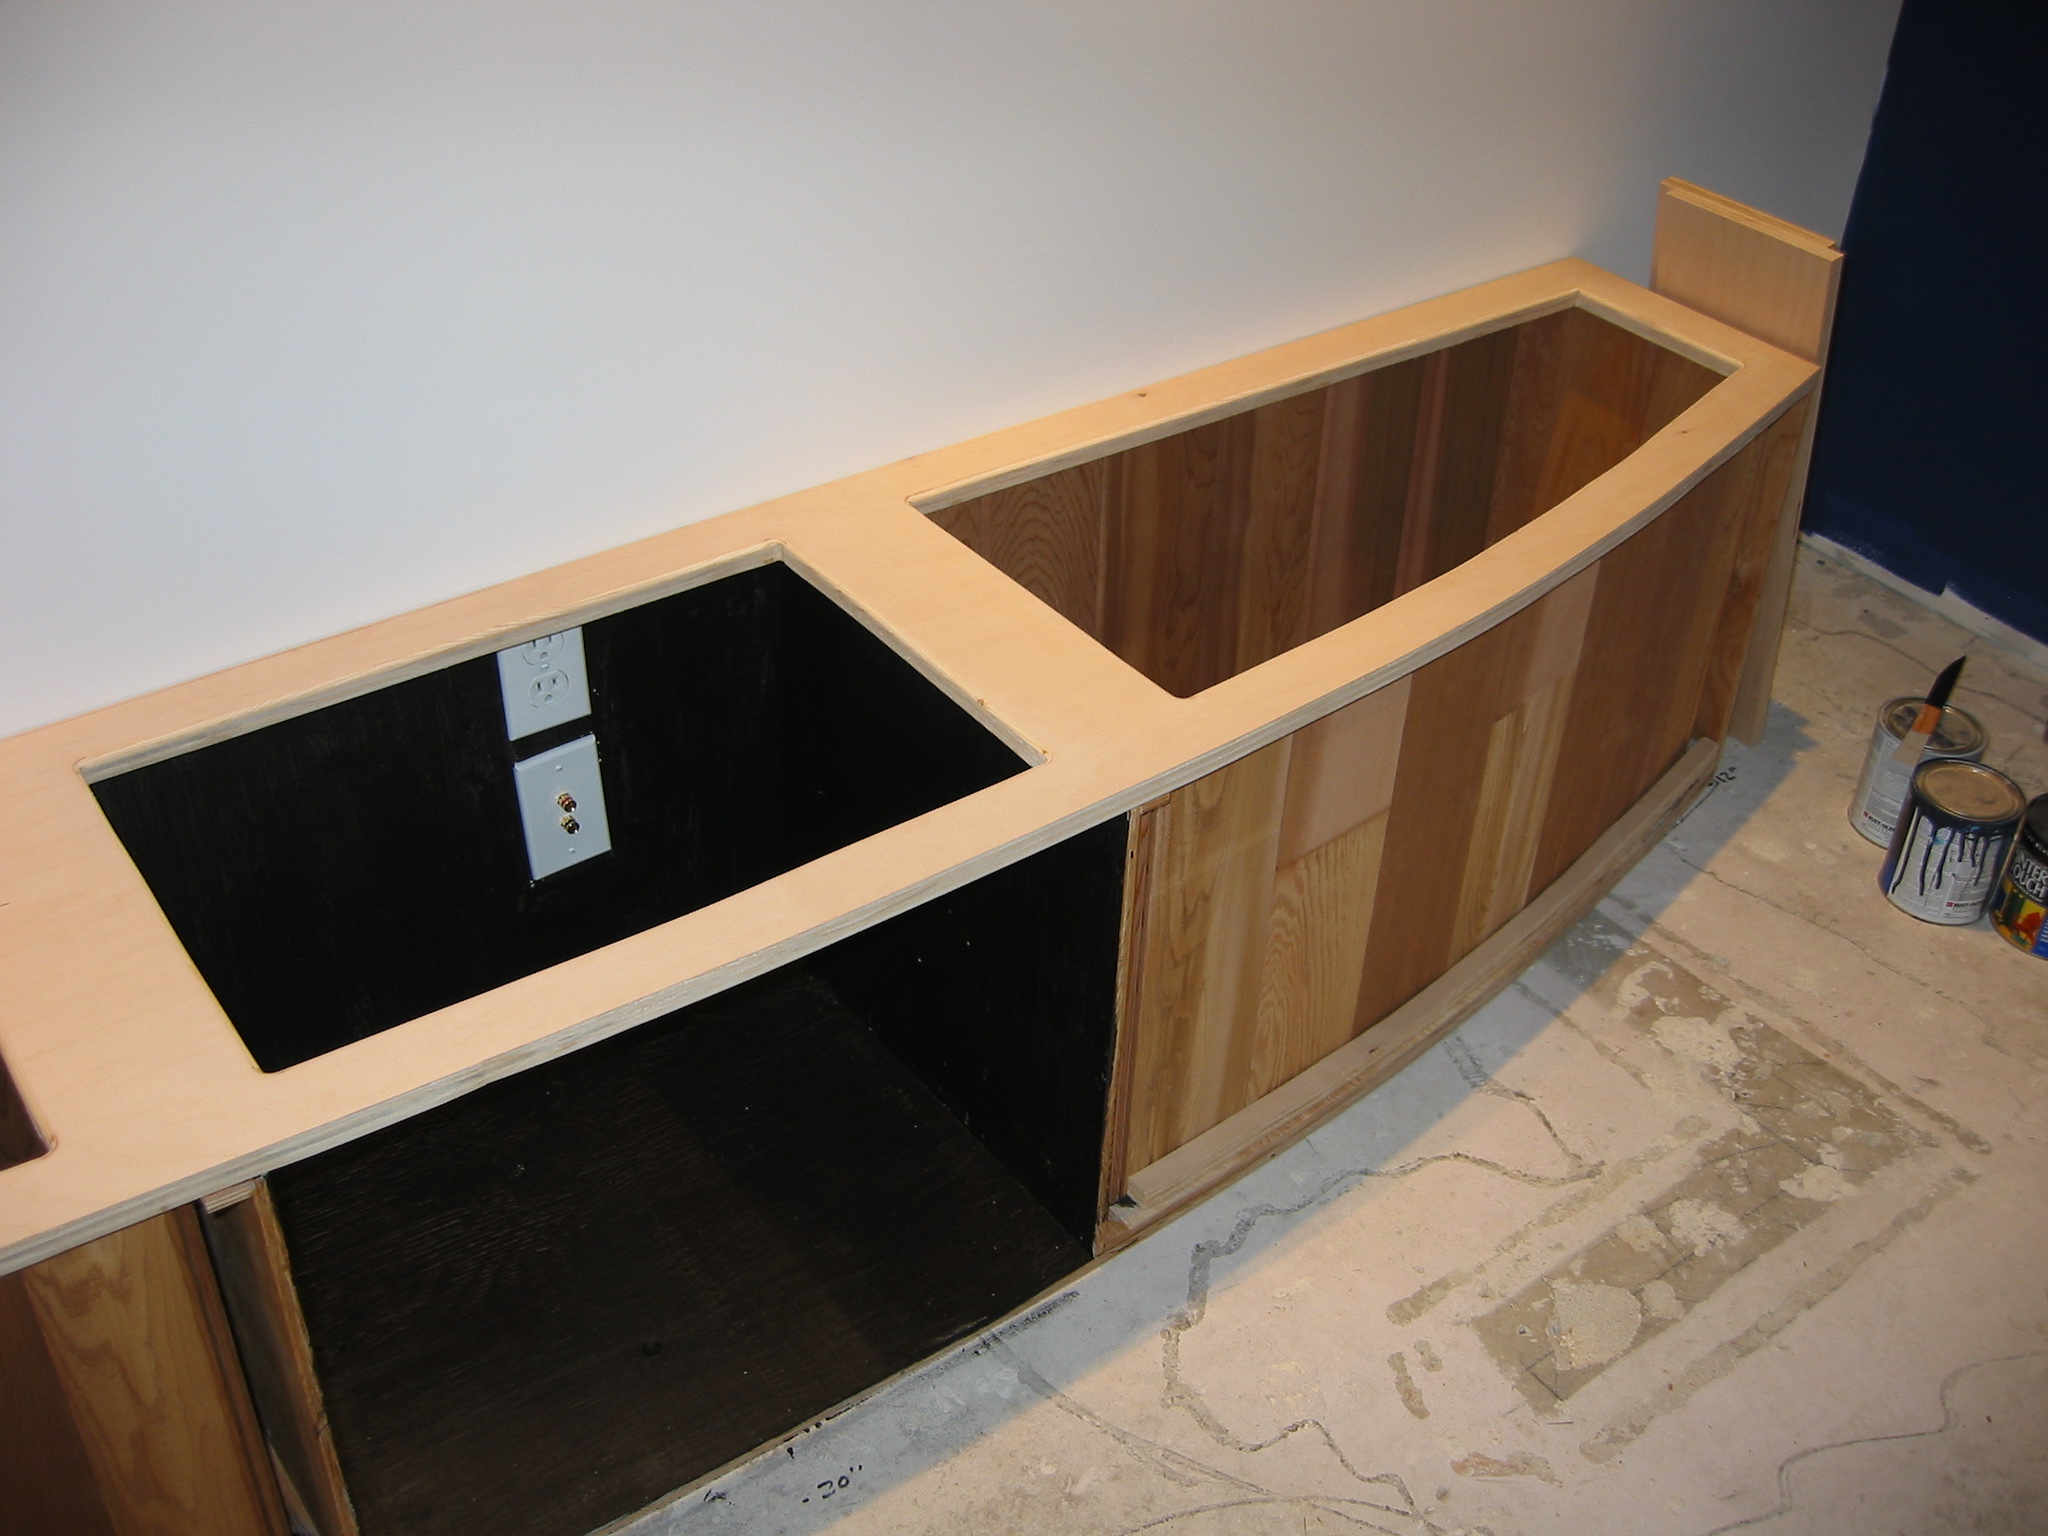
The room would have three cabinets: a built in bookshelf (really, a CD rack), the built in media rack, and a curved cabinet at the front of the room, below the screen, for blanket storage. I built all these over several weekends out of birch plywood and fir trim. The front cabinet was a fun project, and I built it in place (it is anchored to the floor and to the wall). I lined the inside with cedar, and now our blankets and pillows smell fresh each time we use them. The front of the cabinet is curved, and I matched this curve when I built the step into the room.
The French doors I found at the salvage yard were too tall and had to be cut down. And I decided it would be easier and better in the end to fully dismantle and rebuild them. All said and done, I love these doors. They’re heavy and have a great feel. The red-ish tint to the stain I used really sets off the room and pulls it all together.
With the cabinets and the doors installed, it was time for paint and carpet. We chose a deep blue paint for the walls, and white for the ceiling. Having a white ceiling in the media room was a concession on my part, made because of the ceiling height. It’s usually better to have a darker ceiling in a theater because a lighter one will reflect light during a movie. I was concerned about this, but I don’t think its really been an issue.
We found a remnant at the local carpet warehouse for a couple hundred bucks, and the guy they sent over did an awesome job installing it. As soon as it was in I spent a couple hours installing the trim. Suddenly, we had a nearly finished room.
Odds and Ends
In reality, it took a couple more months to really complete the room. There were several small details, like painting a black border around the “screen”, ordering and installing pleated curtains for the small awning window, painting the custom projector mount to match the ceiling, and finding and installing real theater seats in the back row. There are still a couple small items on the list, but their priority is so low, they might never get done.
We’ve had the room for over a year now, and I think we’ve been out to the “real” movies twice. It’s just so much nicer to snuggle up on our own couch, with our own popcorn (and a bottle of wine), and watch a movie on a big screen – without the folks behind you chatting away. And afterwards, it’s only a short hike upstairs to bed.
3 Comments
mindy·March 27, 2005
WOW.
That’s awesome. Makes me nostalgic - in college, I had access to all sorts of cool electronic equipment. One of our favorite weekend activities was renting the SONY party projector to play Soul Calibar on the big screen. Also fun was hooking up a video camera or two, a switcher, and a live feed to the projector during parties. People love watching themselves on tv ;)
Those french doors are beautiful!
Aimee·February 27, 2007
This is great! We are planning to finish our basement into a media room. I will have to come back and read more when we actually get to the point when we can start. :)
Bruce Stenman·September 20, 2007
A great tool for installing both ceiling lights and ceiling speakers for a home theater setup is the X-305 adjustable hole cutter from Hole Pro. It can adjust to cut neat perfect size holes for small halogen or LED or incandescent recessed light cans and up to 12” to handle the cutouts for in-ceiling speakers.
Most 8” speakers require a 9” or larger cutout and this tool does it perfectly in sheetrock, lathe and plaster, acoustic tile, plastics, and wood (for adding muffin fans or vents for cooling the equipment).