Three Month Project Complete in Less Than One Year!
Two months before our wedding last summer, I thought it would be a great idea to start to restore our staircase. It’s one of my favorite features of our house. My thinking was that we could finish it during the summer. It didn’t seem like it would be an expensive project, but would be labor intensive. I was right.
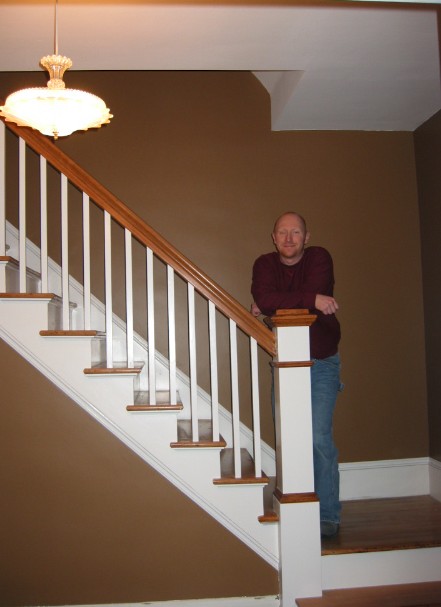
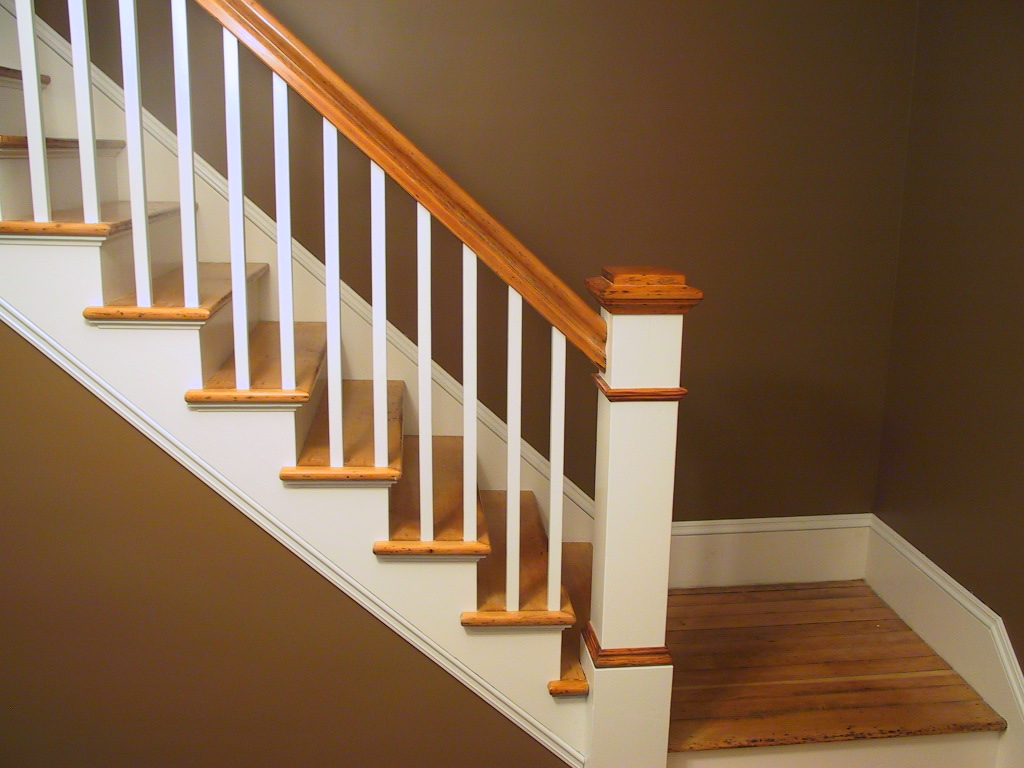
Before and after:
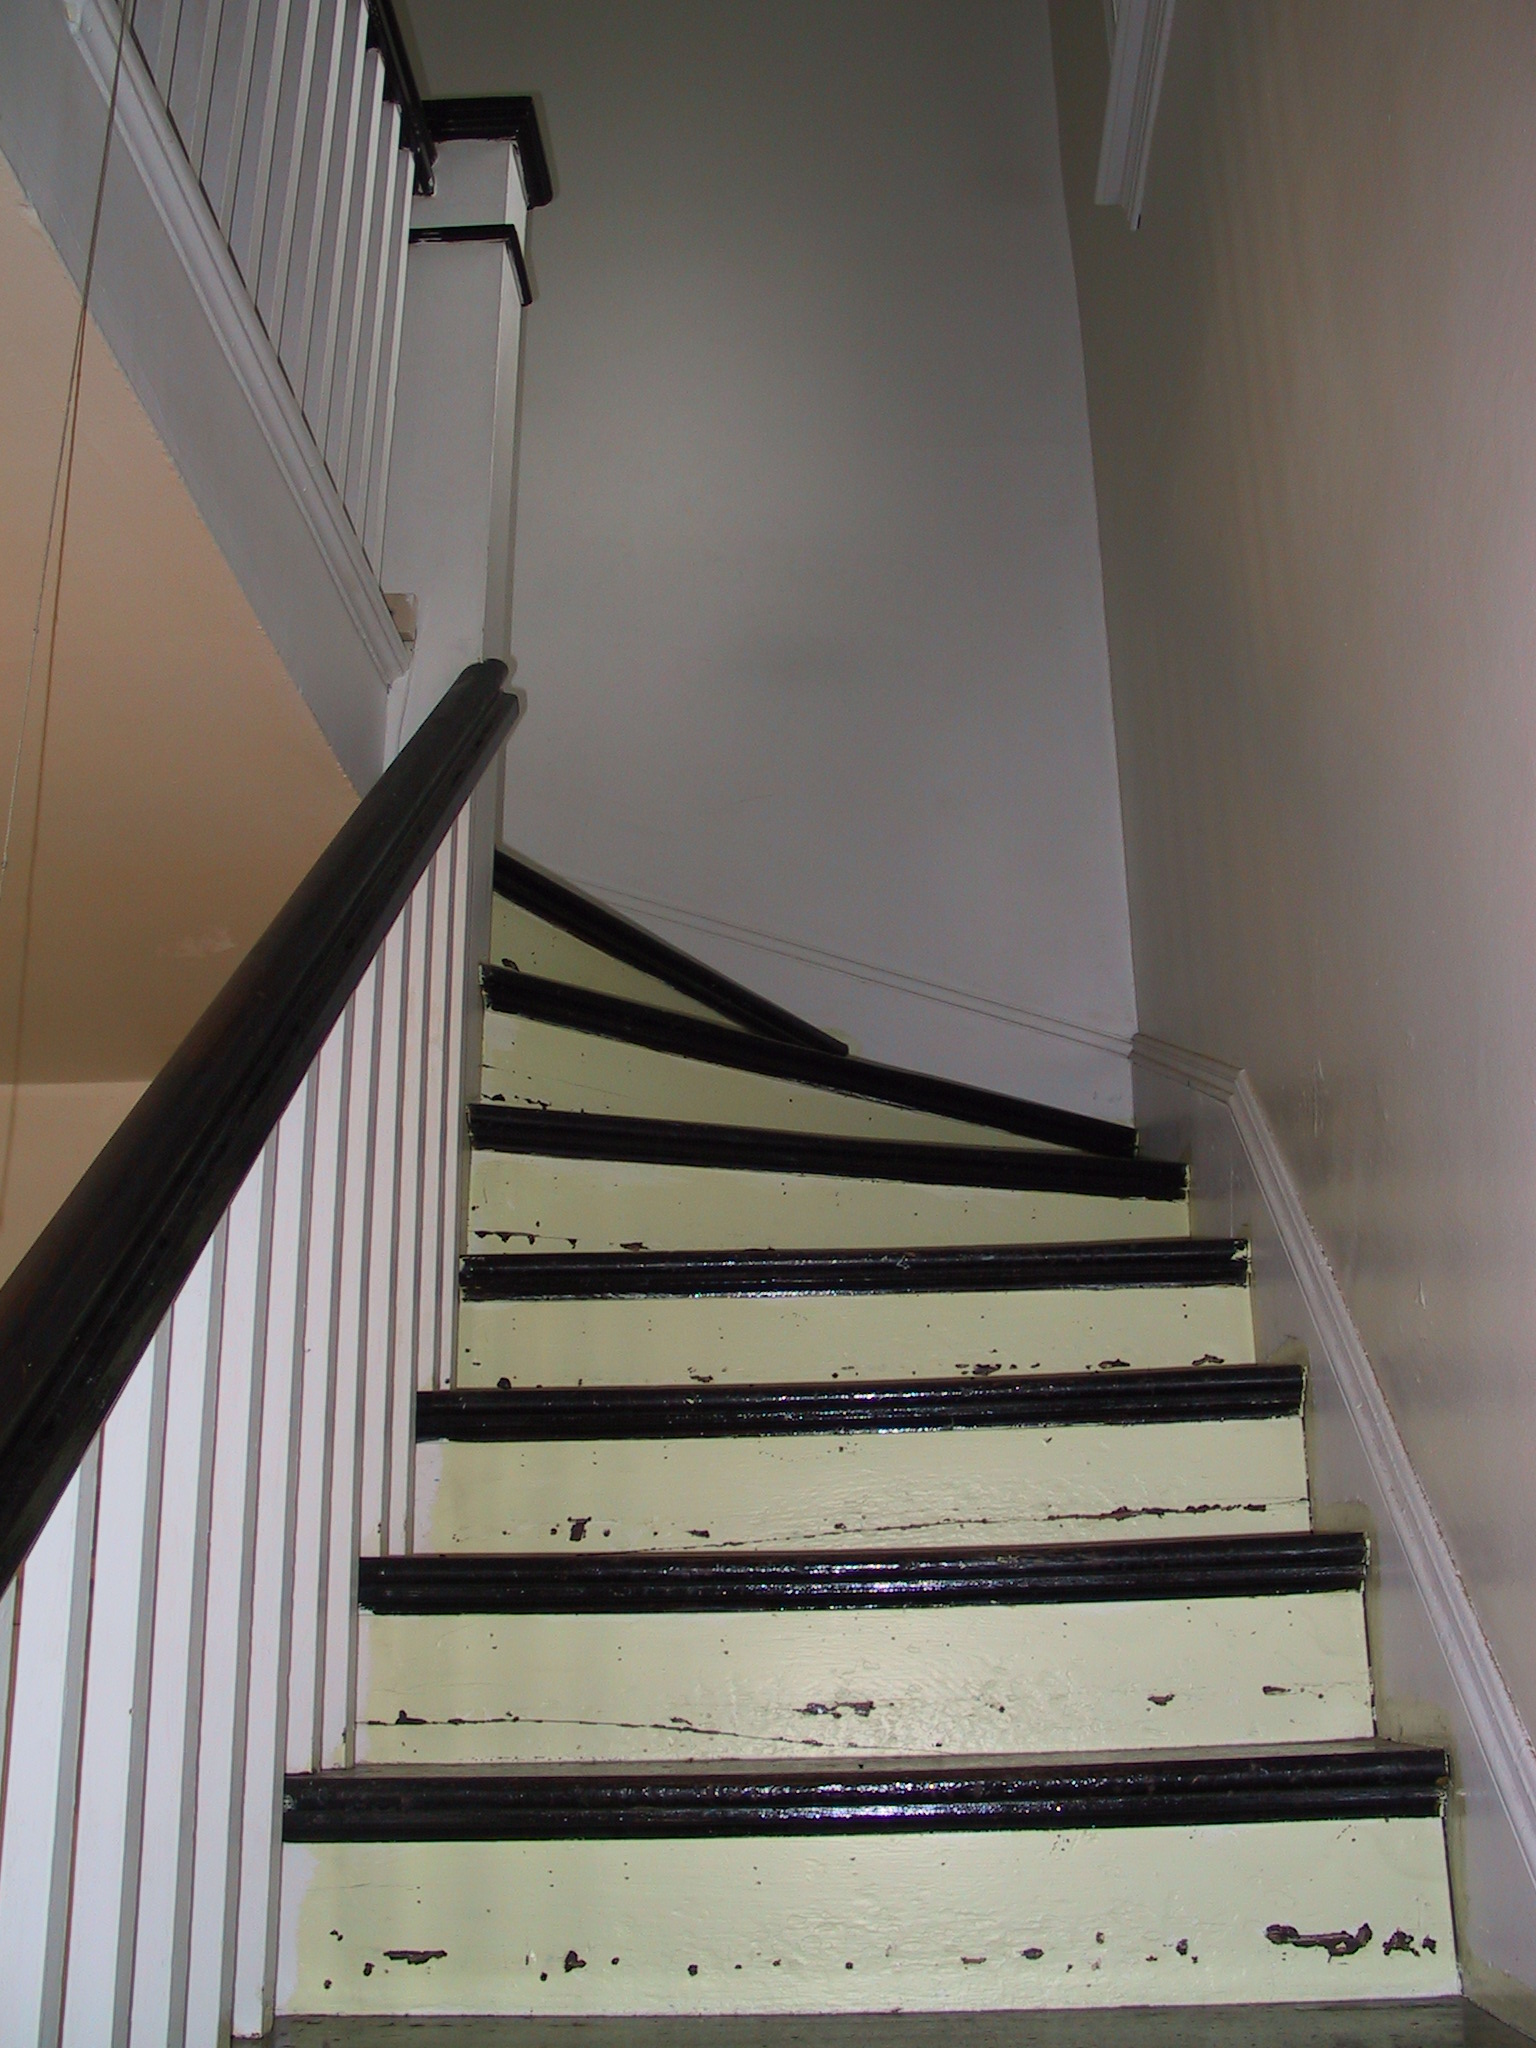

We ended up taking the entire staircase apart, including the treads and replaced them with temporary plywood stairs. We scraped, stripped and sanded all the parts and then started the rebuilding. My initial estimate of a three month project was way off. Luckily it didn’t turn in to a three year project. Instead we finished just about three months short of a year. I’m not sure if we could have completed it in the three months I’d originally planned if we hadn’t gotten married, installed a gas fireplace and built the mantel, and had new electrical service installed, but it is a possibility. So from now on, I’m going to at least double my estimates. Maybe our next feature to the site will allow people to guess how long a project will take and then we can give some sort of prize to whoever gets the closest. Needless to say, Nick and I couldn’t enter and we’d have to figure out how to keep all the guesses secret until the project was complete.
3 Comments
Carol·March 26, 2005
Our stairs look EXACTLY like that in our 1925 bungalow, down to the landings and the newel posts- except we have THREE balusters per step instead of 2, which I stipped due to the drippy paint, only to repaint them white like yours. We decided to cheat on the risers, instead of taking them off or stripping in situ (which would be hard to reach) we covered in 1/4” birch ply, and remade all the cove/ogee moldings under the treads on the sides and under the front of eack oak tread with a router bit similiar to original- did you remake those too? Ours have taken 6 months so far and we have made it to the upper landing, stripped that (so it all looks fine from the living room) then the last 5 steps up where it turns we have not even started. Ugh.
Nick·March 26, 2005
Carol - good idea with the risers. I dismantled ours entirely, removing the treads and risers so I could strip and repair them. A couple of the risers were cracked, and these I glued back together with Gorilla Glue. All of the risers were dimpled from years of boots kicking dents in them. I was mostly successful filling these with a bonding filler and sanding them smooth. I think it would have been difficult for us to cover them with ply, as the corners were mitered into the skirtboard. We managed to save all the trim, which was difficult. A few pieces broke during removal and had to be repaired.
I’m most proud of the treads, which came out better than I had expected. The original stain was pretty stubborn and didn’t want to lift out of the wood pores, so I ended up taking a 1/16” from each tread with my planer. When I reinstalled the treads, I again Gorilla Glued and screwed the treads to each riser from the back-side. If they EVER develop squeaks, I’ll be in a heap of trouble. Hopefully they won’t…
Jocelyn·March 26, 2005
i.e. squeaky stairs, I read an article last month in Restoration Journal where a home restorer said his squeaky staircase was the “patina of his old home.” To some squeaks are desirable I guess. Beautiful job on the stairs!